1

When I work on a design that is using a mirror technique (Applying a Reflect X Transform with copies set to 1) and when I want an edge to meet, I am seeing some kind of gap on the reflected copy. I set this up to meet to the vertical center guide and when the path meets the guide, the reflected copy is not touching the guide. This has been an issue for me for both Adobe Illustrator CC and Affinity Designer, so I must be doing something wrong. I am actively using Adobe Illustrator now however. The solution I have been implementing so far is to make the path go past the halfway mark so the two reflected copies eventually overlap. However, this can cause part of the stroke that is overlapped to be a little darker than the rest of the stroke.

enter image description here

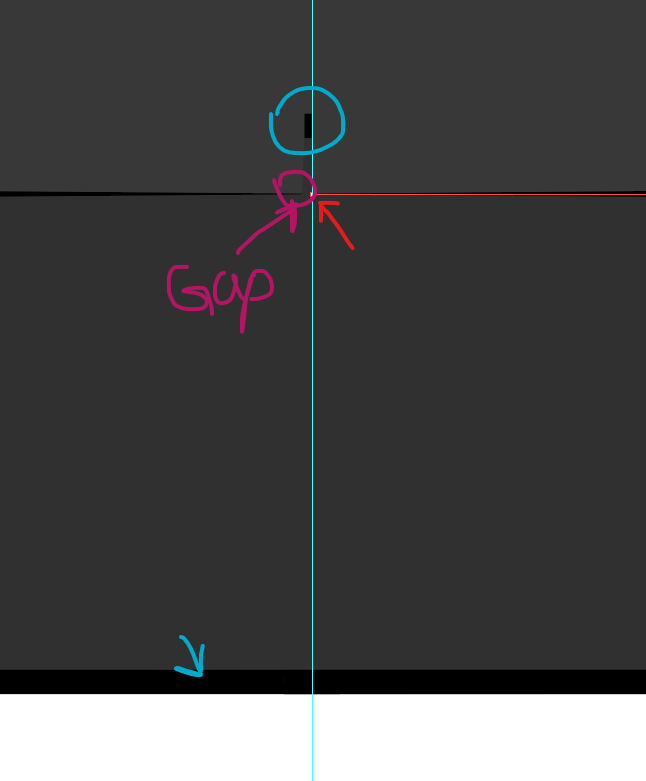
The red arrow shows that the path connects to the vertical guide. The blue circle and blue arrow also shows an object peeking through that is below this object. The purple circle shows there is a gap involved in the reflected copy. I set this up for my main paths to be on the right and the reflected copy to be on the left.

1
  • 1
    There must be objects causing the variation.
    – Scott
    Commented Jul 28, 2019 at 7:30

1 Answer 1

1

I think it's the strokes butting up against the centre line, or protruding over it, that might be interfering with the reflection effect. Illustrator calculates the appearance transform effect from the edge of the artwork upto and including the edge of the stroke (i.e. not the path itself).

Here is one way to avoid the problem, although it takes a little bit of setting up. This method doesn't use an appearance transform effect, but symbols and a regular reflect transform.

  1. Drop a guide in the exact centre of the artboard, calculate it if necessary. Unlocking the guides will allow you to type the location of the guide when it is selected (i.e. the X co-ordinate in the Path options along the top). Don't forget to then lock the guides. Alt+Ctrl+; toggles locking and unlocking of the guides
  2. Draw an object (doesn't matter what it is, a rectangle will do) on one side of the artboard. This can be deleted later
  3. Draw a rectangle with no stroke or fill, over that half of the artboard making sure it fits the entire half of the artboard perfectly. Enabling Smart Guides will help you do it accurately
  4. Select both the object and the invisible rectangle, and do Object > Clipping mask > Make Ctrl+7
  5. Select All Ctrl+A
  6. Click and drag everything and drop it into the Symbols palette to turn it into a symbol
  7. Click and drag the symbol you just created back onto the artboard, and reflect it using Object > Transform > Reflect
  8. Position the symbol against the centre guide on the other half of the artboard. Now you will have two instances of the one symbol
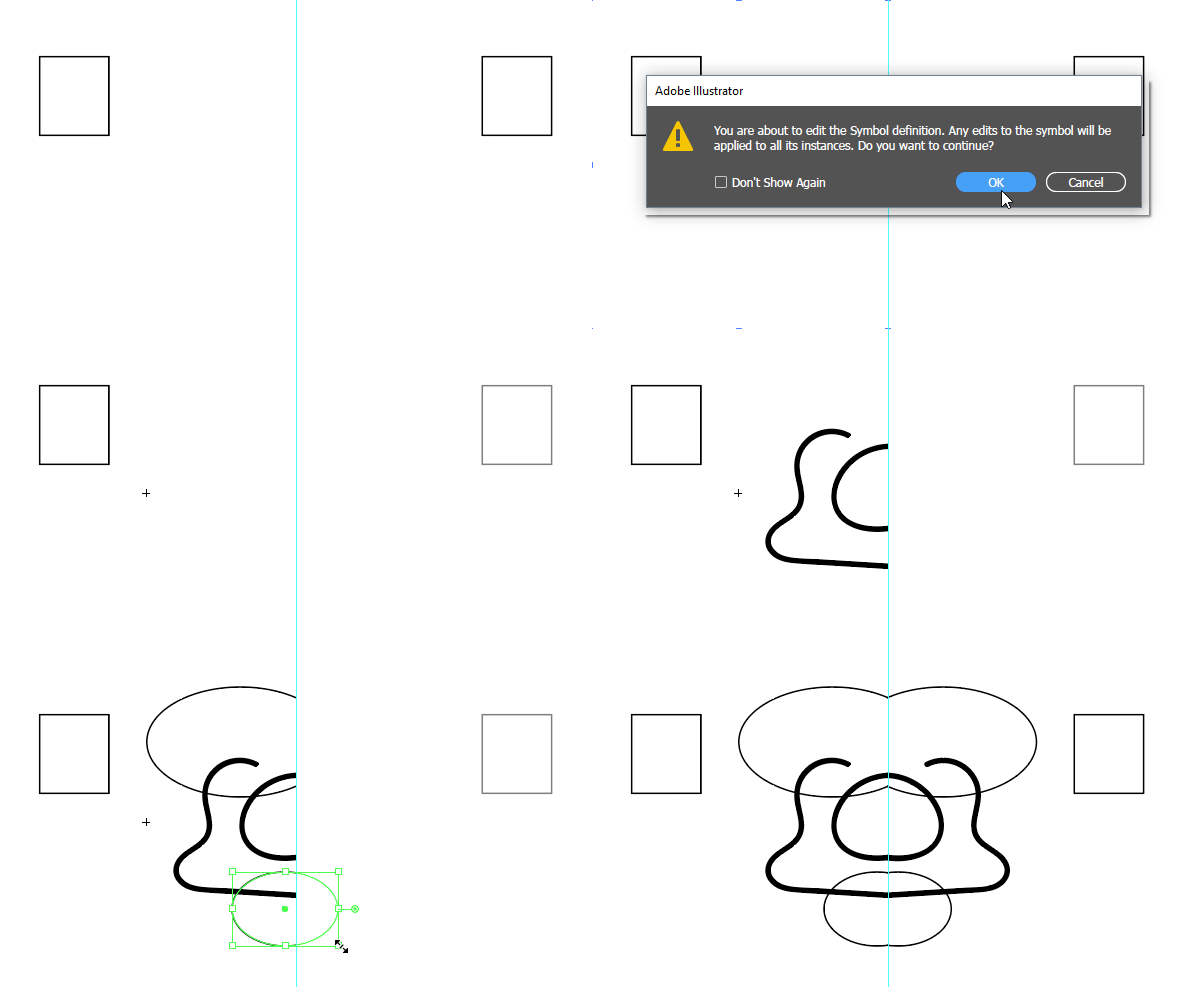
  9. Double click one of the symbols to edit it. Note that a warning will show up saying that you are about to edit the symbol definition. That's fine, just click OK
  10. Double click the rectangle object you made in step 2, to enter the clipping group in isolation mode
  11. Edit/create your artwork
  12. When you have finished, double click outside the symbol to exit isolation mode, and the reflected symbol will then update

That's it really. When you draw or create artwork in step 11, the clipping mask will prevent anything overlapping onto the other side, even if your strokes or objects butt up against or go over the centre line.

Here's a quick example of it in action, showing steps 9 to 12.
enter image description here

5
  • Thank you! I will give this a try. Is there any way to convert my exiting drawing to using this technique? Or will I need to start over?
    – Ethosik
    Commented Jul 28, 2019 at 13:22
  • @Ethosik - yes if you group the artwork before you create the clipping mask. This will mean there is an extra group, so you can double click it again to enter it, or technically you could ungroup it.
    – Billy Kerr
    Commented Jul 28, 2019 at 16:38
  • I am having a difficult time converting an existing drawing to this new technique. If I select my existing artwork group and make a clipping mask, everything disappears but I can see the path outlines.
    – Ethosik
    Commented Jul 31, 2019 at 23:17
  • Also, when I draw past the center mark like you did in your example, it extends the group so it makes the left half become bigger (passed the guide) and I get a large gap
    – Ethosik
    Commented Jul 31, 2019 at 23:25
  • You need to have the clipping mask on top of your artwork. If you have a group inside your clipping path, you need to double click to enter the clipping group, then double click again to enter the group before adding stuff.
    – Billy Kerr
    Commented Jul 31, 2019 at 23:45

Your Answer

By clicking “Post Your Answer”, you agree to our terms of service and acknowledge you have read our privacy policy.

Not the answer you're looking for? Browse other questions tagged or ask your own question.