0

I’m looking for a way in Illustrator to create stitch lines using the Stroke tool and dashed lines. However I’m only able to create straight lines.

I’m a hobby leather worker trying to create my own patterns and this would be hugely helpful in making sure my stitches will line up perfectly. We use a tool called a pricking irons which creates a line of holes the thread will be sewn through. My pricking irons have a 2.2mm teeth width at a 45 degree angle and they are 4mm from middle of tooth to middle of the next tooth.

Any thoughts or ideas?

3 Answers 3

1

If you are seeking precision in dashes to match 4mm in length with a 45° end cap... you won't find any "easy" or automated solution within Illustrator.

Yes you can create dashed strokes with 4mm dashes in Illustrator easily.
However, you won't get any angled end caps.

You can create pattern brush artwork with 4mm lengths and an angled end cap in Illustrator.
However, because of how brushes work the 4mm in dash length will not be maintained on anything other than a strict straight path.


With the above in mind....

The only way to get such precision would be to perhaps create dashed strokes, expand the strokes then manually address the angled end cap aspect (which would mean editing each dash)

Or...

Create a pattern brush, and apply it to strokes, expand, then verify the 4mm length in each dash manually.

Either way, a time consuming venture.


One possible solution, presented by @joojaa, may be a Scatter Brush in Illustrator with all options set to Fixed and made Relative to Path.
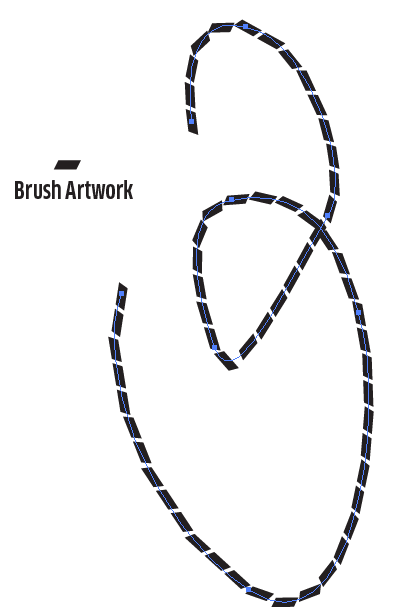
enter image description here

It may not work for everything, but it appears promising.


It seems to me that Illustrator may be the incorrect tool for this. Not my bailiwick, but something such as a CAD program may be better suited to maintaining dash lengths and angled end caps.

2
  • Scatter brush with no random?
    – joojaa
    Commented Feb 27, 2021 at 22:01
  • 1
    Possibly @Joojaa -- I hadn't thought of that, but just tried it.. it might work.
    – Scott
    Commented Feb 27, 2021 at 22:14
1

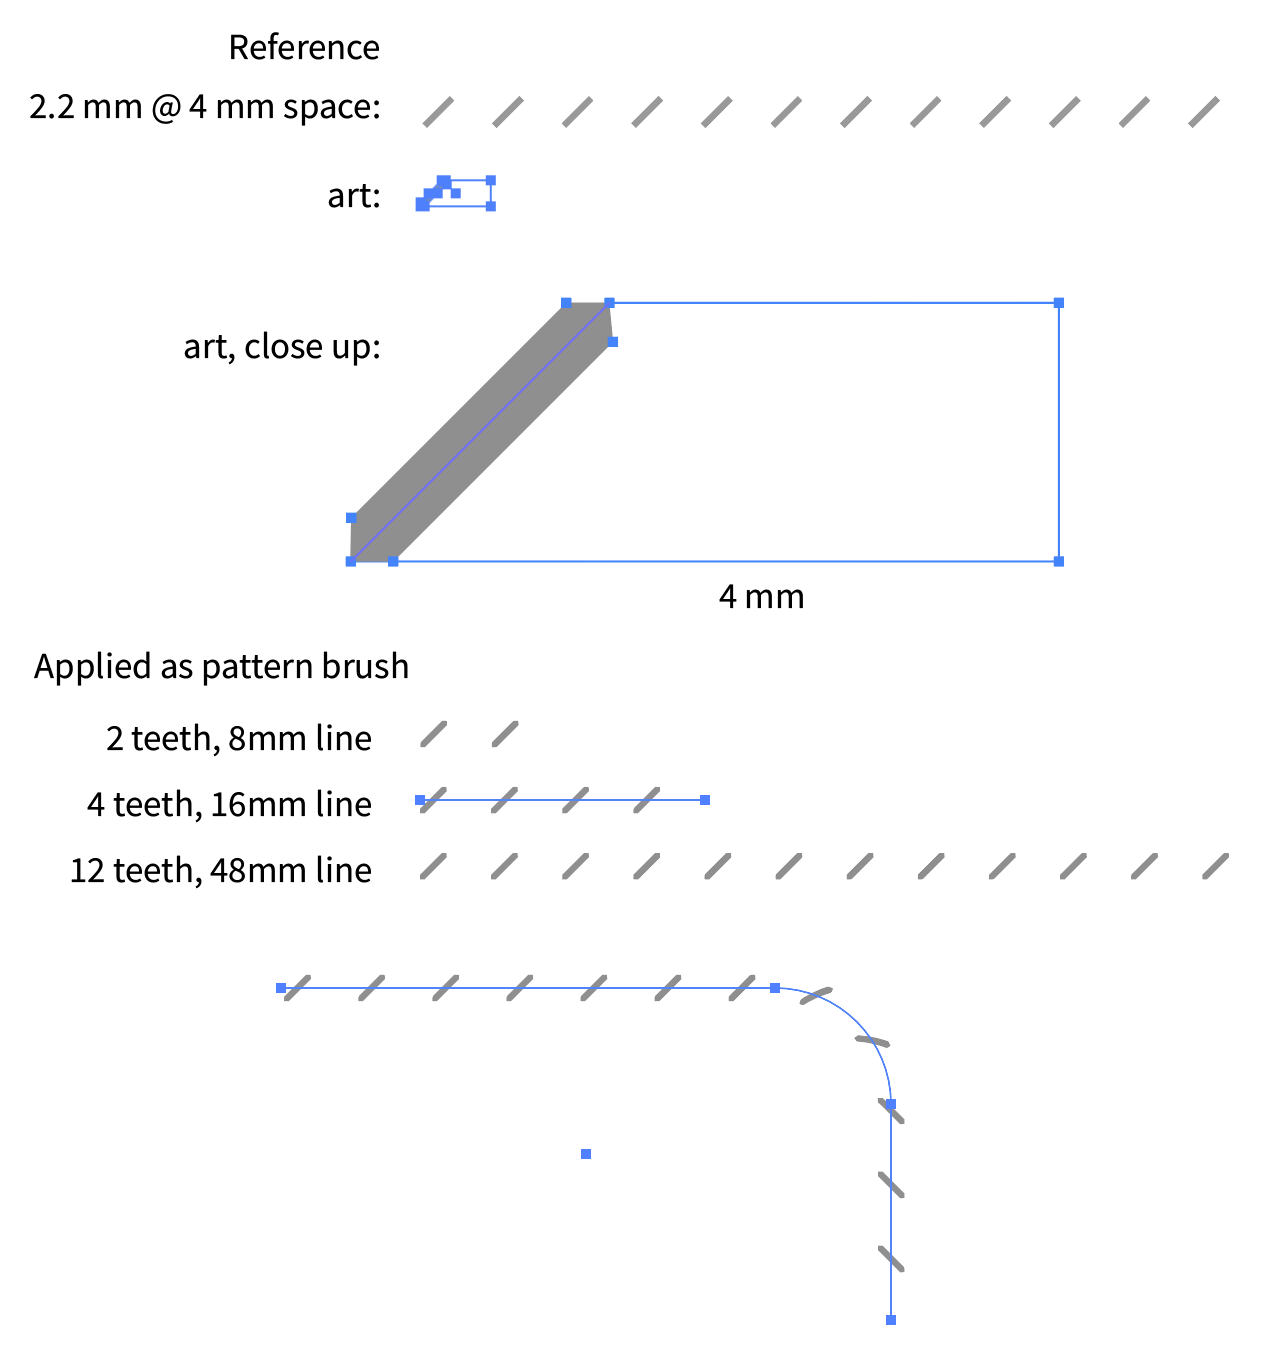
I think the best method may be a pattern brush. That way, you can create patterns that match your pricking irons just by drawing lines of particular lengths, and applying your pattern brush.

screenshot


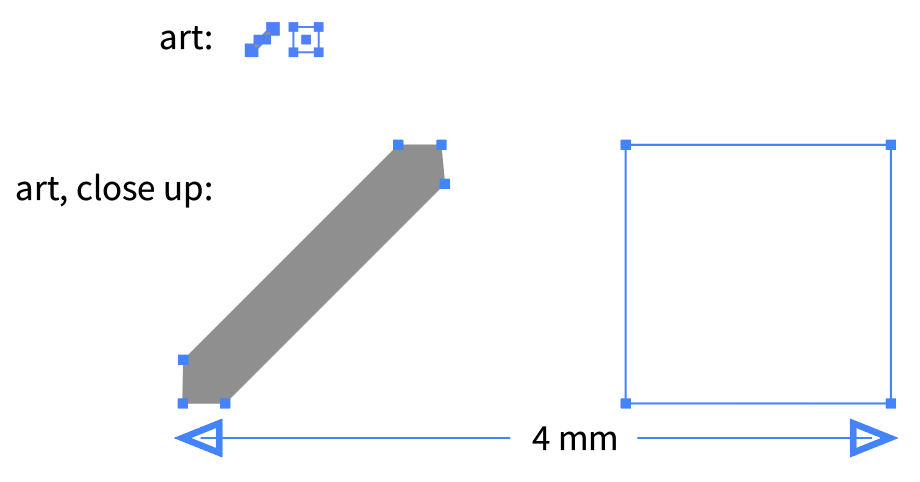
EDIT: Below is a simpler way to construct the art for the pattern brush. It's just two shapes, the filled visible part, and the transparent part that gives the group the proper width of 4mm.

enter image description here

2
  • I think this would work really well, but a small question, how are you creating that shape, as it looks like a shape with one side having a stroke and the rest white/transparent. Commented Mar 4, 2021 at 3:29
  • It's two shapes: one filled, one transparent. I'll add a version that's much simpler to the answer.
    – MG_
    Commented Mar 4, 2021 at 10:30
0

For anyone else came across this question and did not find responses that are helpful enough, here is a great video I found on youtube.

https://www.youtube.com/watch?v=0-AlNZuxIkM&ab_channel=Nirani

happy pattern making and stitching ^^

Your Answer

By clicking “Post Your Answer”, you agree to our terms of service and acknowledge you have read our privacy policy.

Not the answer you're looking for? Browse other questions tagged or ask your own question.