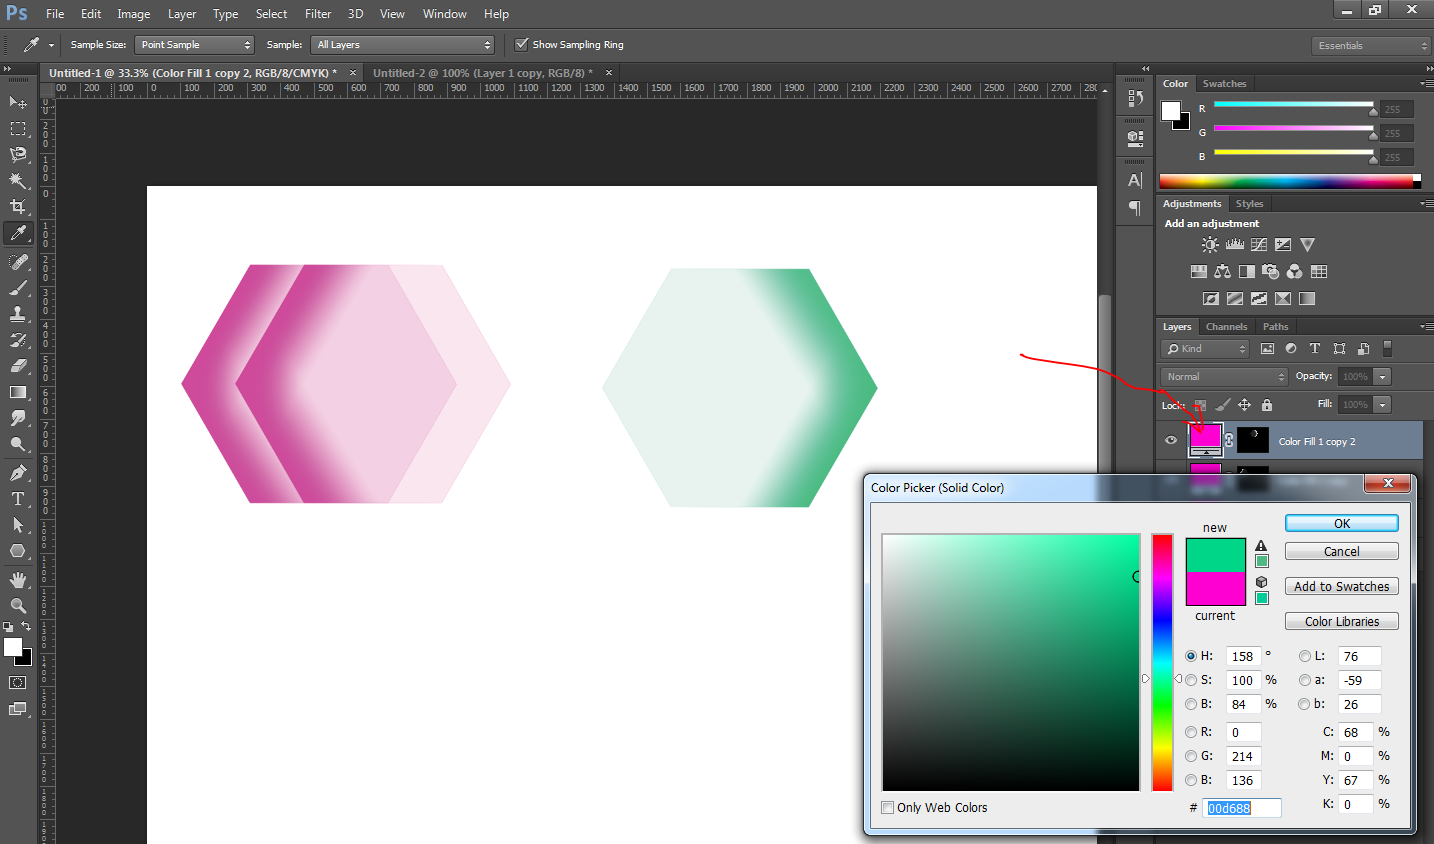
I like the repeated shape, with color "overlap" but I do not know what to call this, or how to create something similar in Photoshop.
How do I create this effect in Photoshop?

I like the repeated shape, with color "overlap" but I do not know what to call this, or how to create something similar in Photoshop.
How do I create this effect in Photoshop?
Like many terrific repetition effects, this one is much simpler than it looks. The layout technique is called "Step and Repeat." As the name says, it's done by stepping a fixed distance, repeating the element, stepping again and repeating, as needed. This is the basic way that any pattern is created, but it's not restricted to making patterns.
In Photoshop, you can accomplish the same thing via the Edit > Free Transform command.
Create the initial shape layer
Hold down Alt/Option while you choose Edit > Free Transform
Move the shape. Notice that because you used the Al/Opt key, you actually created a copy on its own layer.
Press Enter/Return to accept
Press Clt-Alt-Shift-T (Cmd-Opt-Shift-T) -- the keyboard shortcut for Transform Again plus Alt/Opt -- to create another copy that is offset the same distance from the first as the first is from the original.
This "Copy and Repeat" technique works for all transforms, by the way, including scaling, rotation and skew. In this example the basic hexagon repeats, evenly distributed from either side toward the middle.
In CS6 and later you can use vector shapes (stretch a six-sided polygon created with the Shape tool), each on its own Photoshop layer. Fill with a color-to-transparent gradient and change the Blend Mode to Overlay. This augments that overlap effect created by the partial transparencies of each layer adding to the one below. Each blend mode will give you a different effect, so you've plenty of effects to choose from.
In earlier versions, create shapes at first, then use Ctl/Cmd-Enter/Return to change the shape path into a selection, and fill the selection on its own raster layer with a color-to-transparent gradient as above. You can also use a soft-edged brush to paint the color gradient to the edge of the selection, following the shape. The artist who created your example used that approach.
That will give you a starting point from which to experiment.
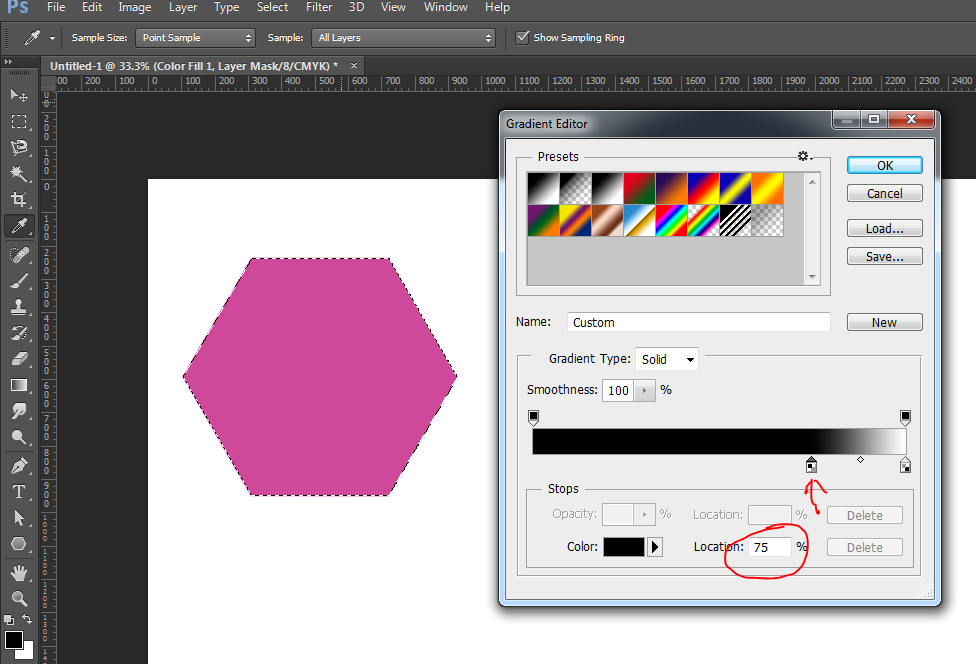
I agree I would do this in Illustrator, but since you ask for Photoshop, here it goes. There are probably endless other ways of doing it, but this is what I did, using colour layers to be able to easily change the colours.


Draw a gradient that goes from the bottom right edge to the top left edge.

Select Screen on the Gradient Mode

Draw another gradient from top right to bottom left

Press Ctr-D to get rid of the marquee selection
Now you have your hexagon with the hexagon gradient. To create the rest of them, just
Make sure that Black is selected as the background colour

With the mask selected (not the colour, very important. click on the mask thumbnail it to select the masl, do not double click it), draw a marquee around the hexagon
Press V to select the move tool and move the hexagon to the right.

To create the opposite hexagons, draw a marquee around the hexagon (again, with the mask selected), press Ctr-T to transform the selection and rotate it.

To create other colours, just double click on the colour thumbnail (now it is on the colour, not on the mask) and select the colour you want.

This is most easily created in illustrator. I could do this in half as many steps, and generate a better palette.
But if I were doing this in photoshop this is how I would break it down.
Background: Stock image. I would use hue/saturation to get the color I wanted. I'd either find or create a pattern of white 2x2 box of white lines, but would leave 2 side lineless so I could use it as a repeating pattern. It also looks like there is a gradient mak on the lower edge.
Shapes in the center: Shapetool to make a hexagon. Transform to widen it. Change fill to gradient to transparent. I would copy the layer and change the color of the fill.
If you select the shapes, you can plug in precise coordinates. I would use math to change the coordinates and make them exact. Another method is create a box shape that you could use as a ruler.
Text is pretty standard but has a white outer shadow coming from the top. This would also go under the colorful shapes you just made.
This decorative lines, is using just a line tool. Hope this helps.