5

I have a photo and a while ago I had added a layer on top of it which was pure white at 50% opacity.

How can I compensate that effect to get back the original picture?

I have tried adding a black 50% layer, but the picture becomes too dark and there is not enough contrast.

0

4 Answers 4

9

To undo the 50% white overlay, you want a color transformation that:

  • maps 50% gray to black, and
  • keeps pure white unchanged.

Among the GIMP layer modes, the Burn mode turns out to do what you want, if the color of the Burn layer is 50% gray (#777777):

"Burn mode inverts the pixel value of the lower layer, multiplies it by 256, divides that by one plus the pixel value of the upper layer, then inverts the result."

Thus, if you create a new white layer, set its blending mode to Burn, and then draw an exact copy of the original overlay in 50% gray onto that layer, it should cancel the overlay exactly.

Does it? Let's try it out.

Here's our test image — a basket of mushrooms with a layer of white text over it:

Test image with semitransparent white overlay
Original picture from Wikimedia Commons, released into the public domain by author George Chernilevsky.

Now, I could've cheated and just used a copy of the text layer as my burn mask, but in practice, you'd typically have to reconstruct the mask by hand. So what I did was use the Magic Wand tool (with the threshold set to 25; you'll need to tweak this for optimal results) and try to select as much of the text as I could, without going (too much) outside it. Then I switched to my new white layer, and filled the selection I'd obtained with 50% gray:

Reconstructed overlay mask

Of course, I could've improved this mask further with manual tweaking, but I deliberately went with this imperfect mask for demonstration purposes. Changing the blending mode of this mask layer to Burn, here's the result:

Reconstructed image with overlay removed

Note how minor traces of the overlay remain in places where the mask is not 100% accurate, and there's also some left-over JPEG compression noise visible in the de-masked areas, but most of the image is nearly perfectly reconstructed.

(If I'd used an exact copy of the text overlay for the burn mask, and hadn't saved the image in a lossy format before attempting to reconstruct it, the result would've been visually indistinguishable from the original. Actually, that's what I did at first, but I felt that made for a rather boring and somewhat unrealistic demonstration.)

1
  • What is this magic! Very good trick.
    – go-junta
    Commented Aug 25, 2015 at 22:15
4

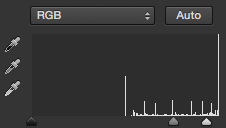
You can use a levels adjustment layer. I did this in Photoshop but the same technique can be used in other programs.

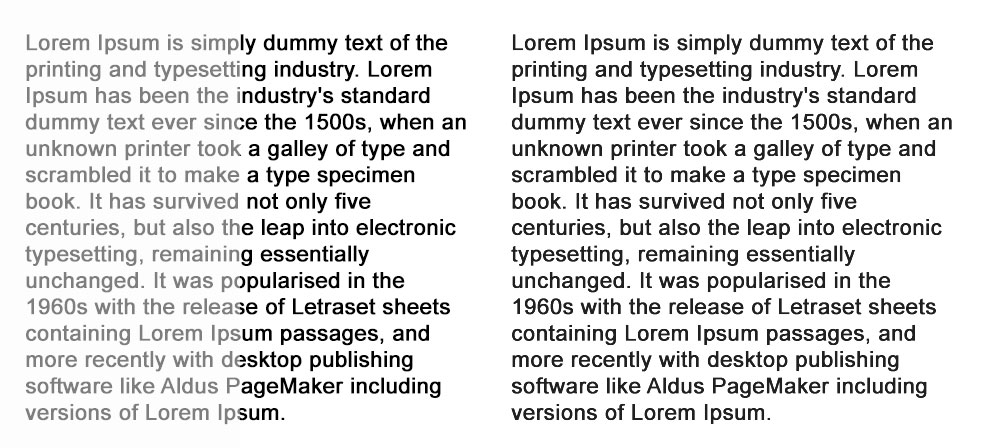
On the left I applied a 50% opacity white layer to show the effect. On the right I had the 50% effected text layer and then applied a levels adjustment layer.

Layers Adjustment Layer

Note: I moved the white part of the levels slider so the white background would not darken. This makes every pixel to the right of the white slider completely white.

Result

Result from using a levels adjustment layer

4
  • Nice, thanks. I did it in Gimp using Colors > Levels
    – user48895
    Commented Aug 25, 2015 at 15:55
  • Any way to find the exact value though?
    – user48895
    Commented Aug 25, 2015 at 15:55
  • @Ghuizing I am not sure how you could calculate this to get absolute black. After applying the levels adjustment, you can check the color output. You will have to be careful how much you change because parts of the text will all become black instead of shades of black on the edges.
    – AndrewH
    Commented Aug 25, 2015 at 16:03
  • @Ghuizing in theory the black point should be at 50% (128).
    – hobbs
    Commented Aug 26, 2015 at 1:24
2

Just to complete Andrew's answer:

You can use the levels but if you don't want to adjust manually there's a very simple way to do it. My screenshots are with Photoshop but I see you have the same tools with Gimp.

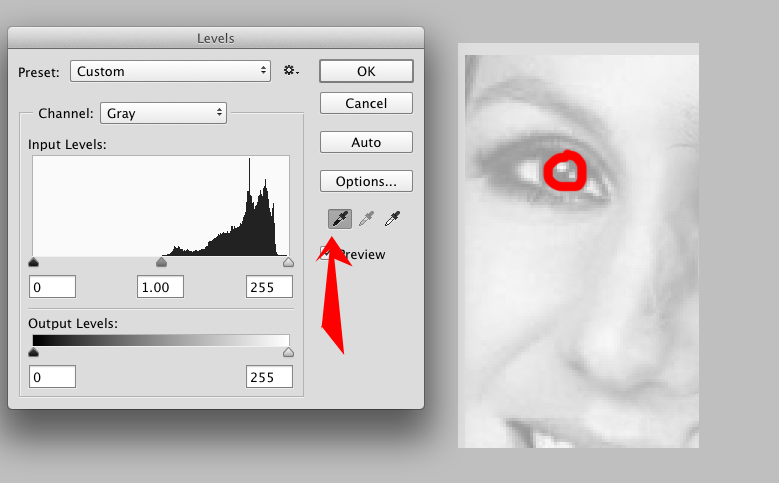
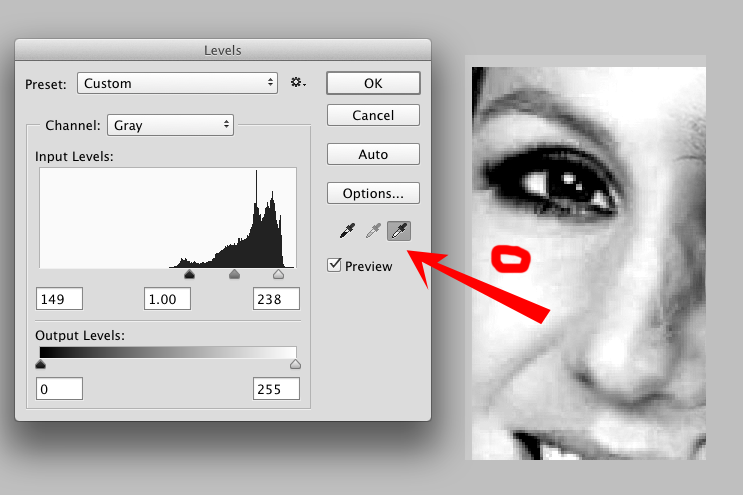
You simply select the black color picker on your Levels panel and go click on the darkest part of your picture.

Color Picker adjust levels

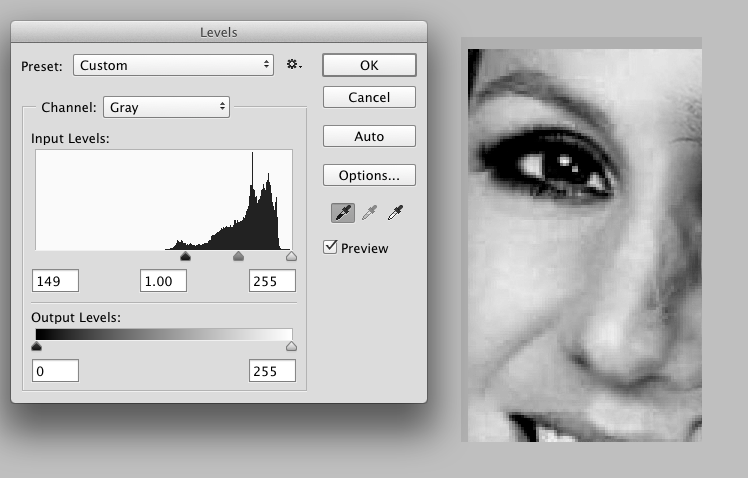
You should get something like this already:

Adjust contrast with photoshop adjutments levels

Then select the white color picker on the Level Adjustment panel and find the lightest part of your image. You might need a few tests.

For my picture, I had to click on the cheek.

And this is what you'll get. It's not perfect but a nice shortcut. Then you can adjust manually if you want more nuances.

Color adjustment with Gimp

You can adjust the color of your black and white by double clicking the color pickers.

0

You'll likely never get the exact same image back, but another option is to take your existing image layer, duplicate it, and then set the blending mode to the layer above to 'multiply'. You may need to do that a few times.

2
  • Actually, the blending mode you want is Burn, not Multiply; see my answer for a demonstration. Commented Aug 25, 2015 at 22:12
  • @IlmariKaronen very nice! Great tip.
    – DA01
    Commented Aug 25, 2015 at 22:49

Your Answer

By clicking “Post Your Answer”, you agree to our terms of service and acknowledge you have read our privacy policy.